Windows10環境でAnaconda、Pycharmインストール・設定トライ(2)
2. PyCharmのインストール
ちょっとした苦労あり。何度もインストールし直してようやくできた。よく解説したサイトがないように思われる。
本ブログを書きたくなった理由でもある。
気軽にnext.......とやってインストールするのだが、Anacondaをインストールしたのに、numpy、matplotlibなどがimportできない事象がでた。
どうも、AnacondaとPyCharm間の連携がうまくできていないのだな、と分かったが色々調べて、次のサイトで、合点がいった。
Getting numpy to import in Python (Pycharm), Anaconda installed
2.1 PyCharm のダウンロード
PyCharm のダウンロードページにアクセスし、Community 版をダウンロード。
https://www.jetbrains.com/pycharm/download/#section=windows
Community
2.2 PyCharm のインストール
ダウンロードしたインストーラを開く。
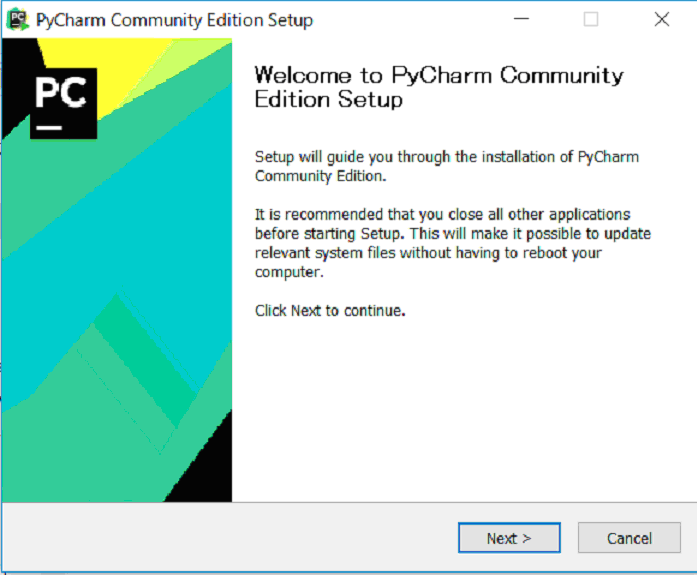
Next
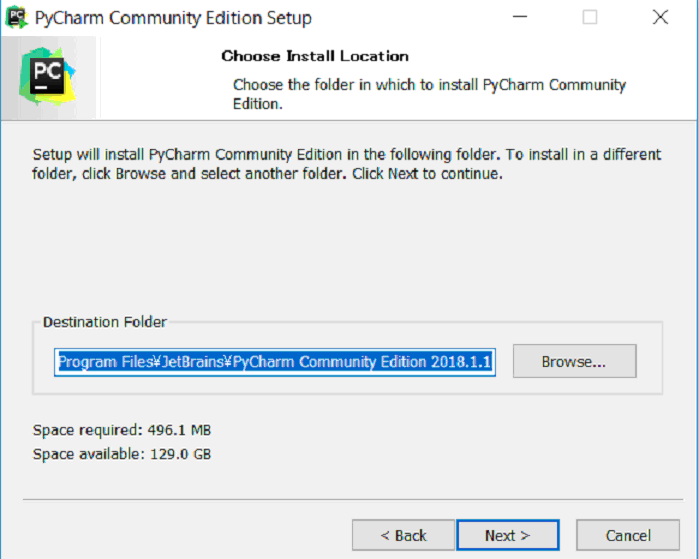
Next
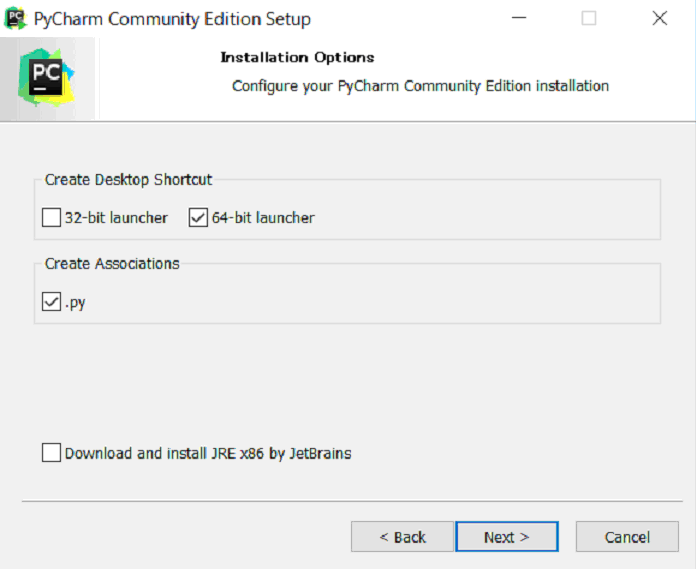
64-bit launcher、Create Associationsにチェック
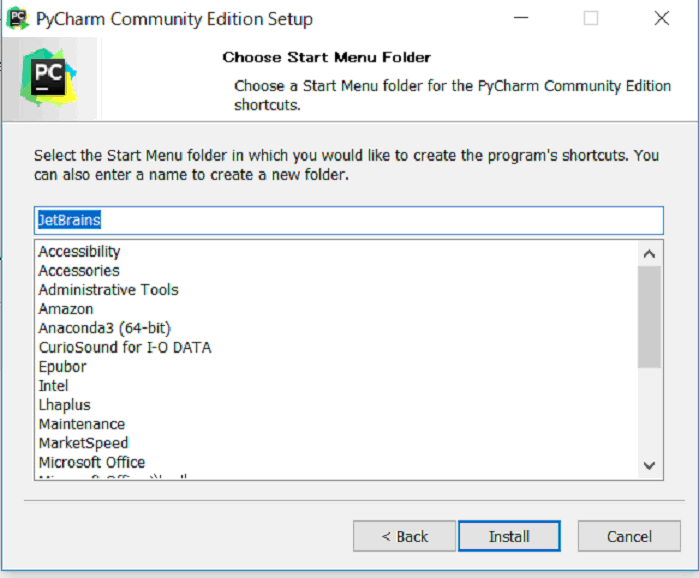
Install
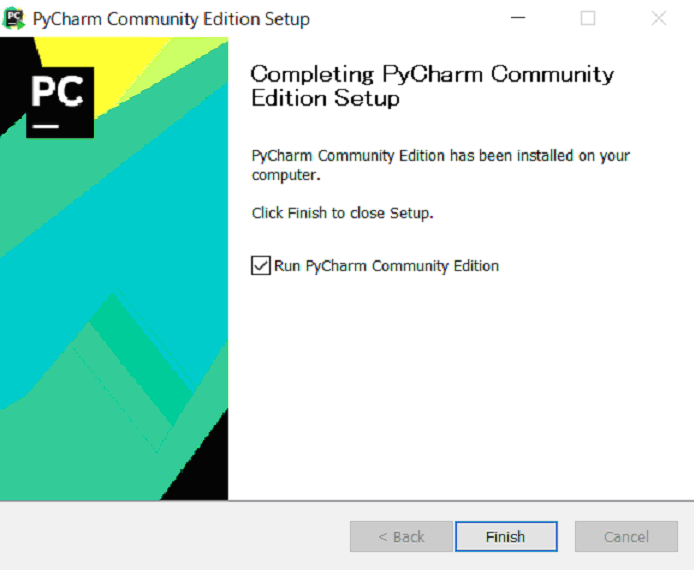
Run PyCharm Community Editionにチェック、Finish
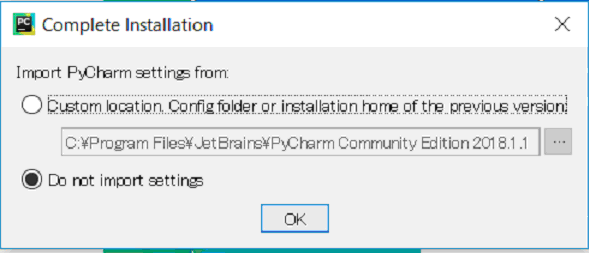
Do not import setteings選択
OK

IntelliJ選択(Darculaでも良い、好みによる)、Next Featured plugins
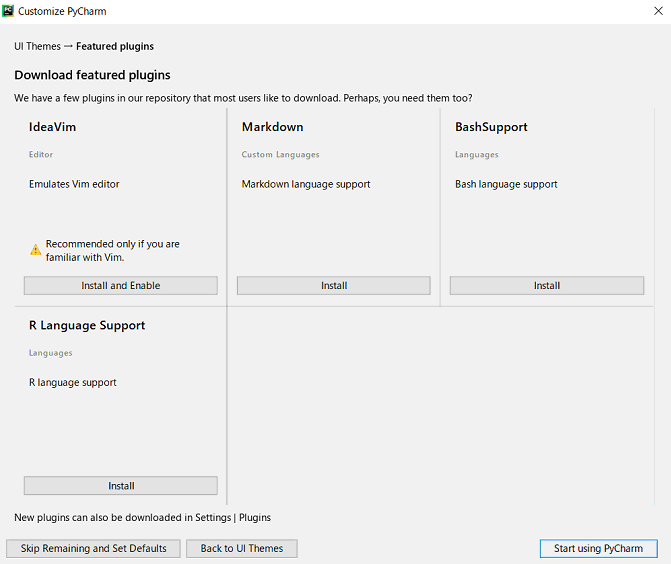
そのまま、Start using PyCharm
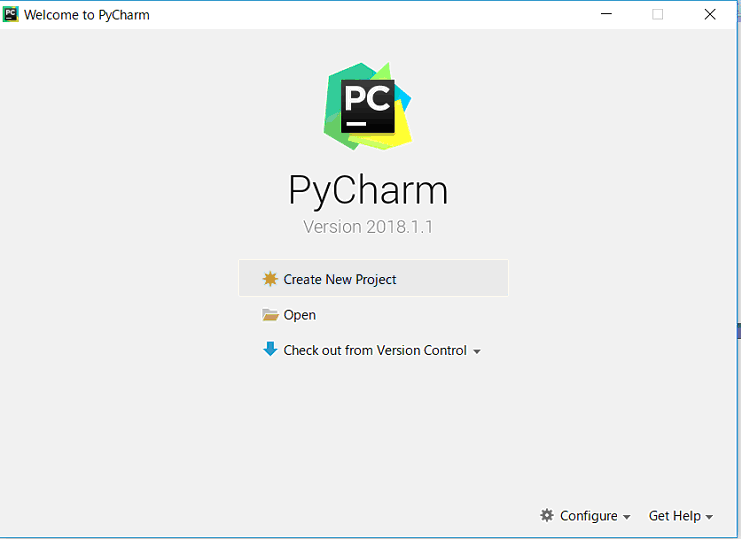
Create New Projectクリック

untitledを例えばtestへ、
▶Project interpreter: New Virtualenv environment展開
(これ重要)
場合によっては、3つ先の画面ように、Exising interpreterに、
Python..\.....\Anaconda\Python.exe表示される。この場合は、そこから先に進んでいく。
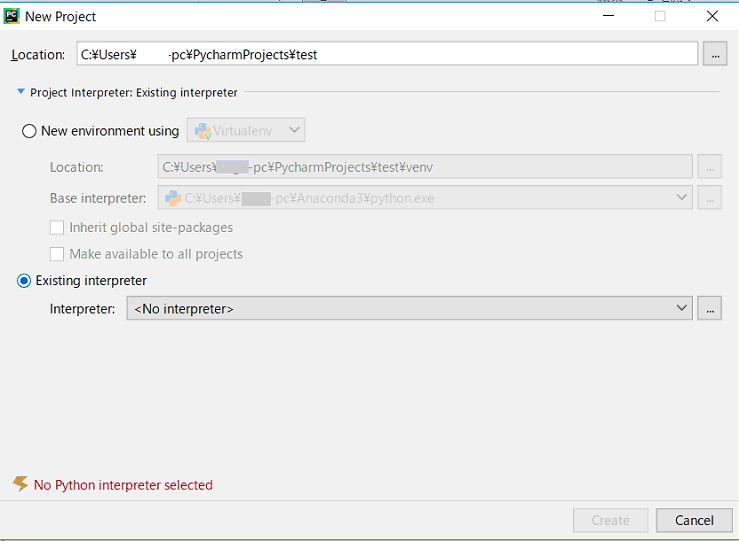
Existing interpreter選択、 Interpreter: <No intepreter>右ボタン …クリック

System Interpreter選択 → Anaconda3\python.exe自動選択される 、OK 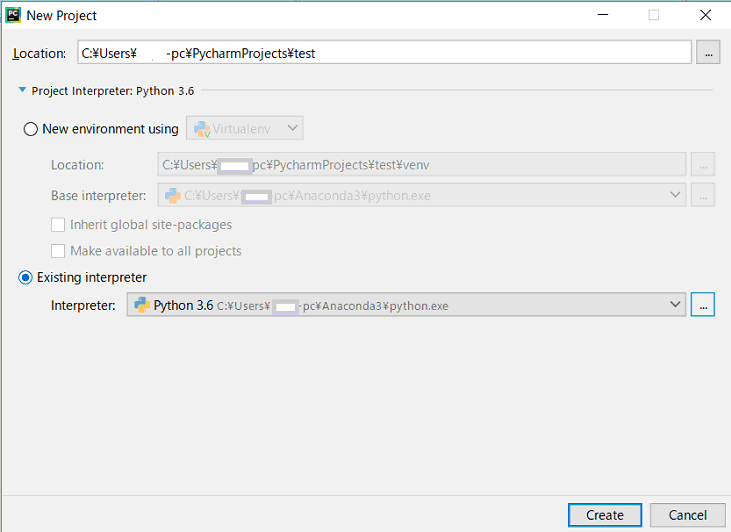
Exising interpreterに、Python..\.....\Anaconda\Python.exe表示 → Create
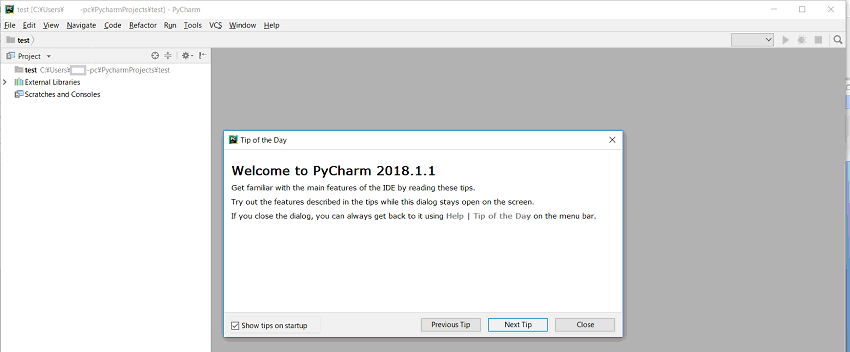
右下Closeクリック
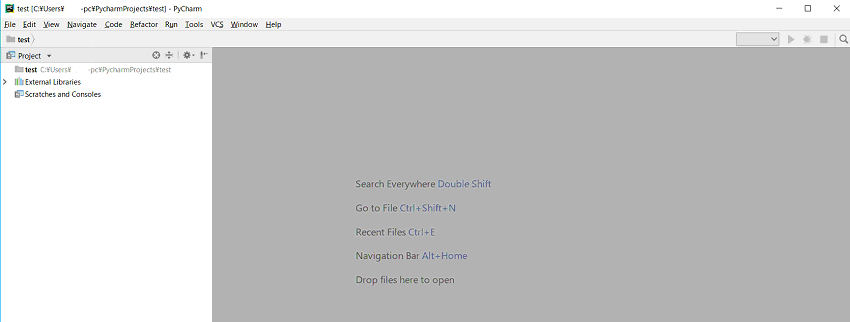
この時点で、いろいろな設定が開始しているようだ。
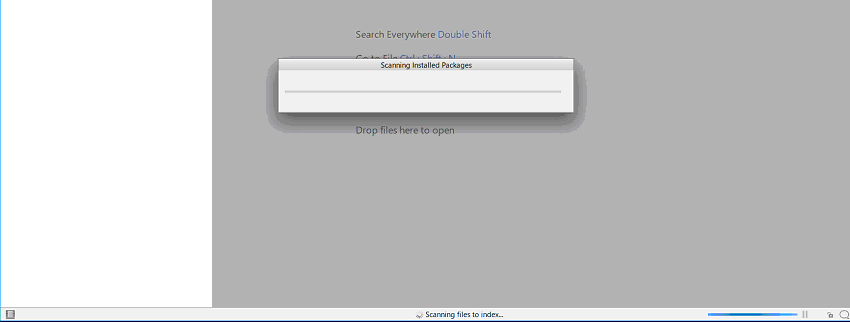
Scanning installed Packagesの表示、
下部ステータスバーに Scanning Files to index….と表示。
testプロジェクト右クリック、New、Python File

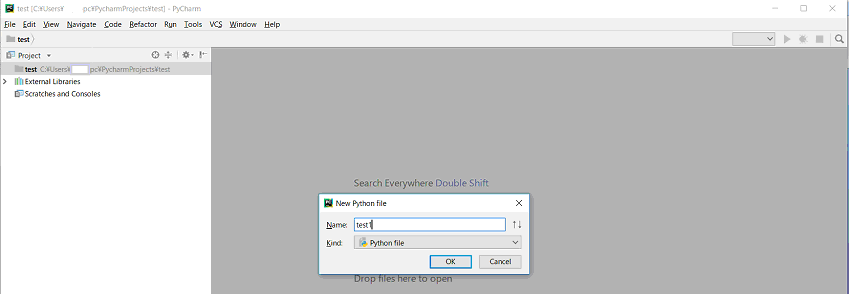
Name: 例えばtest1、OK

test1のコードを記入。
例
import numpy as np
import matplotlib.pyplot as plt
#複数のグラフを同一の領域に描画。 sin波とcos波を描画、併せてsy=-1とy=1の直線をhlines関数で描画。
xmin, xmax = -np.pi, np.pi
x = np.arange(xmin, xmax, 0.1)
y_sin = np.sin(x)
y_cos = np.cos(x)
plt.plot(x, y_sin)
plt.plot(x, y_cos)
plt.hlines([-1, 1], xmin, xmax, linestyles="dashed") # y=-1, 1に破線を描画
plt.title(r"$\sin(x)$ and $\cos(x)$")
plt.xlim(xmin, xmax)
plt.ylim(-1.3, 1.3)
print('グラフ表示')
plt.show()
記入後RUN

Edit Configulations…の表示。まだ設定中の様子。

下部ステータスバーに Indexing…と表示。10分くらい経過、、、

更に、いろいろ設定中。Indexing…から下記に変わった。

ここで再びRUNトライ。test1実行の準備ができたようだ。

test1クリック → グラフ表示、下部に“グラフ表示”メッセージ。
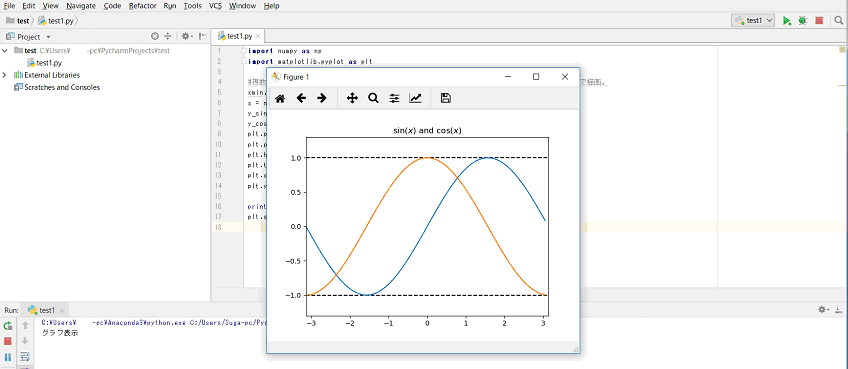
20分以上経過して漸く終了。PCによってはもっとかかる?
グラフを閉じて、
File>Save Allで作成コード念のため保存。
RUNしたコードは、自動的に保存されているようである。
終了は、
File>Exit

まだ何かやっているようなので、cancel待機。
かなり時間が経過して、下部ステータスバー表示が無くなったところで、
再び、File>Exit、準備できたようである。
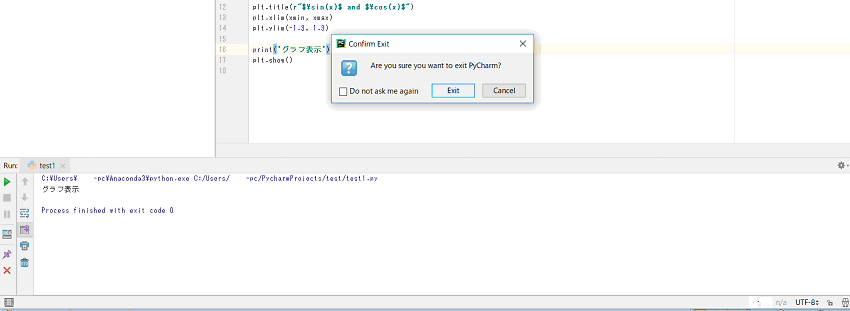
Exitで終了。
ずいぶん時間がかかるものだ、と嘆息。
PyCharmを再起動してみる。
ステータスバーを見ると、Scanning…Indexing…など表示。しかし短時間で終わる。
よし!
test1コードは、windows(C:)>user>...?pc(コンピューター名)>PycharmProjects>testフォルダーに入っている。

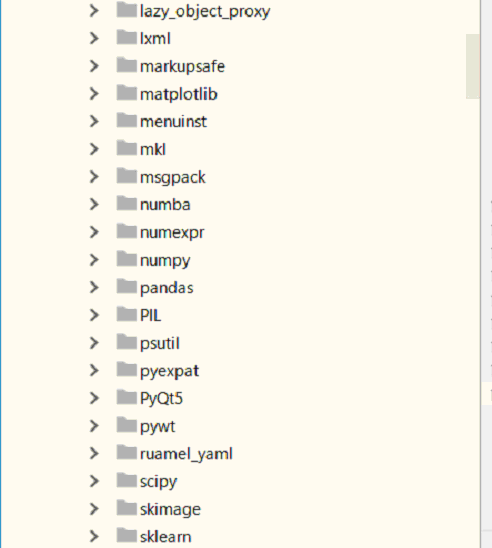
バイナリー スケルトンに何が入っているか、、

matplotlib、numpy、pandasなど入っているのが分かる。
既存の.pyファイル群が
Python-anaconaインストール時に生成された、
C:\user>コンピューター名\Documents\Python Scripts フォルダーに入っている場合、
その呼び出しはどうするか?
File>Open...から
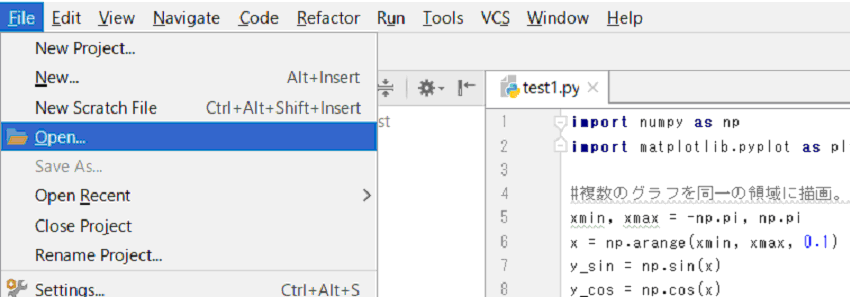
C:\user\..._pc(コンピューター名)\Documents\Python Scripts\を辿って、ターゲットファイルまたはフォルダーを指定。


OK
次回の起動では、
File>Open Recent ...から容易に指定可能である。
Windows10環境でAnaconda、Pycharmインストール・設定トライ(1)
「ゼロから作るDeep Learning」の学習を始めて3か月が経った。
過去に遡って理解に苦労した点などを記事を書くつもりであるが、
愛用のWindows VistaのPCがダウン、仕方なくWindows10のPCを購入。
早速、Anaconda、Pycharmをインストールすることにした。
その前に、
Python学習には、最初はIDLE → 慣れてきたらPycharm使用が良いとの記事あり。
---
https://gammasoft.jp/python/python-development-environment/
GAMMASOFT
ホーム> Pythonで仕事を自動化するには> プログラミング
Pythonの開発環境について(IDLEとPyCharm)
当社が普及を推進している「Pythonで仕事自動化」において、推奨している Python の開発環境は以下の2つです。
・IDLE(Pythonに付属)
・PyCharm(Community Edition:無償版)
まずはIDLEでプログラミングをすぐに始める
慣れたらPyCharmに乗り換える
---
おお良いね。だいぶ慣れてきたところ。
-----------------------------------------------
1. Anacondaインストール
参考サイト
Anaconda を利用した Python のインストール (Windows)
1.1 Anaconda のダウンロード
Anaconda のダウンロードページから、Python 3.5 の 64 bit のインストーラをダウンロード。2018/4
https://www.anaconda.com/download/#_windows
Anaconda 5.1 For Windows Installer
Python 3.6 version *
64-Bit Graphical Installer (537 MB)
1.2 Anaconda のインストール
・ダウンロードしたファイルを開き、インストーラを起動。
「Next」を押して次に進む。
・ライセンスを確認し、「I Agree」を押して次に進む。
・「Just Me」を選択されていることを確認し、「Next」を押して次に進む。
・インストール先を尋ねられるので、「Next」を押して次に進む。
・2 つのチェックボックス (環境変数 PATH への設定、Python 3.5 をデフォルトの Python として登録) にチェックが入っていることを確認し、「Next」を押して次に進む。
注) Add Anconda to my PATH environment variable(環境変数 PATH への設定)は、Not recommended ...と赤字表示されるが、チェックを入れたほうが便利。
コマンドプロンプトを起動したとき、何処のディレクトリでもpythonを実行できる。
なお、インストール時Anaconda Promptなるものが作成されるので、ここで作業する限り、ディレクトリを移動しなくても良いだが。
・インストールが始まる。
・Install microsoft VSCcode→Skip
・Finish」を押し、インストーラを閉じる。
1.3 Windows標準コマンドプロンプト起動
Add Anconda to my PATH environment variable(環境変数 PATH への設定)にチェックを入れてインストールした場合、何処のディレクトリでもpythonを実行できる。
プロンプト起動
Microsoft Windows [Version 10.0.16299.371]
(c) 2017 Microsoft Corporation. All rights reserved.
C:\Users\...-pc>
Python起動
C:\Users\...-pc>python
Python 3.6.4 |Anaconda, Inc.| (default, Jan 16 2018, 10:22:32) [MSC v.1900 64 bit (AMD64)] on win32
Type "help", "copyright", "credits" or "license" for more information.
>>>
Python起動した、OK!、exit()する。
>>> exit()
C:\Users\...-pc>
1.4 Anaconda Prompt 起動
Anaconda Prompt を起動する
「スタートボタン」 ⇒ 「すべてのアプリ」 ⇒ 「Anaconda Prompt」 を選択する。
(base) C:\Users\...-pc>
1.5 pip のアップグレード
(base) C:\Users\...-pc>python -m pip install --upgrade pip
Collecting pip
Downloading https://files.pythonhosted.org/packages/62/a1/0d452b6901b0157a0134fd27ba89bf95a857fbda64ba52e1ca2cf61d8412/pip-10.0.0-py2.py3-none-any.whl (1.3MB)
100% |????????????????????????????????| 1.3MB 1.6MB/s
Installing collected packages: pip
Found existing installation: pip 9.0.1
Uninstalling pip-9.0.1:
Successfully uninstalled pip-9.0.1
Successfully installed pip-10.0.0
(base) C:\Users\...-pc>
再度やってみる。
(base) C:\Users\...-pc>python -m pip install --upgrade pip
Requirement already up-to-date: pip in c:\users\suga-pc\anaconda3\lib\site-packages (10.0.0)
OK!もう良し。
1.6 pip コマンドのオプション
pip --help コマンドを実行すると、アンインストールなど、pip コマンドを利用して可能な操作が一覧表示される。
(base) C:\Users\...-pc>pip --help
Usage:
pip <command> [options]
Commands:
install Install packages.
download Download packages.
uninstall Uninstall packages.
freeze Output installed packages in requirements format.
list List installed packages.
show Show information about installed packages.
check Verify installed packages have compatible dependencies.
config Manage local and global configuration.
search Search PyPI for packages.
wheel Build wheels from your requirements.
hash Compute hashes of package archives.
completion A helper command used for command completion.
help Show help for commands.
General Options:
-h, --help Show help.
--isolated Run pip in an isolated mode, ignoring environment variables and user configuration.
-v, --verbose Give more output. Option is additive, and can be used up to 3 times.
-V, --version Show version and exit.
-q, --quiet Give less output. Option is additive, and can be used up to 3 times (corresponding to
WARNING, ERROR, and CRITICAL logging levels).
--log <path> Path to a verbose appending log.
--proxy <proxy> Specify a proxy in the form [user:passwd@]proxy.server:port.
--retries <retries> Maximum number of retries each connection should attempt (default 5 times).
--timeout <sec> Set the socket timeout (default 15 seconds).
--exists-action <action> Default action when a path already exists: (s)witch, (i)gnore, (w)ipe, (b)ackup,
(a)bort).
--trusted-host <hostname> Mark this host as trusted, even though it does not have valid or any HTTPS.
--cert <path> Path to alternate CA bundle.
--client-cert <path> Path to SSL client certificate, a single file containing the private key and the
certificate in PEM format.
--cache-dir <dir> Store the cache data in <dir>.
--no-cache-dir Disable the cache.
--disable-pip-version-check
Don't periodically check PyPI to determine whether a new version of pip is available for
download. Implied with --no-index.
--no-color Suppress colored output
(base) C:\Users\ >
Anacondaインストール無事終了。
一応、環境変数・pathチェックしてみる。
コントロールパネル→システムとセキュリティ→システム→システムの詳細設定を順にたどって、環境変数設定表示。
(コンピューター名)ユーザ環境変数 → pathへ
下記path設定あり。
C:\Users\(コンピューター名)\Anaconda3・・・ここにpython.exe
C:\Users\(コンピューター名)\Anaconda3\Library\mingw-w64\bin
C:\Users\(コンピューター名)\Anaconda3\Library\usr\bin
C:\Users\(コンピューター名)\Anaconda3\Library\bin
C:\Users\(コンピューター名)\Anaconda3\Scripts
python.exeがあるpathも設定されており、コマンドプロンプトが何処のディレクトリでも実行可能であることが分かる。
C:\Users\(コンピューター名)\Anaconda3\Scripts\idle.exe
にあり、ショートカットを作っておくと便利。
idle.exe起動で、
Python 3.6.4 Shell起動画面
File>New Fileで
UntiltedのPythonコード開発画面
次、PyCharmにトライ。
IDLEでPythonコード作成、RUN
本のコード例を使用して、Pythonの世界に浸る、理解を深める。
先ず、IDLEでPythonコード作成、RUNに慣れる。
1. Python IDLEを起動して、Python shellオープン
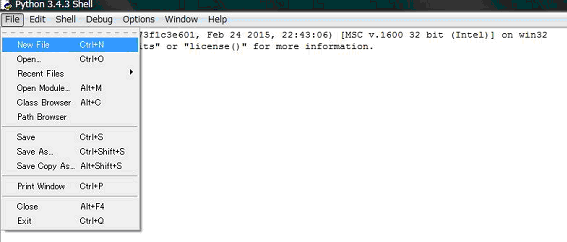
2. File>New File で新ファイル作成準備
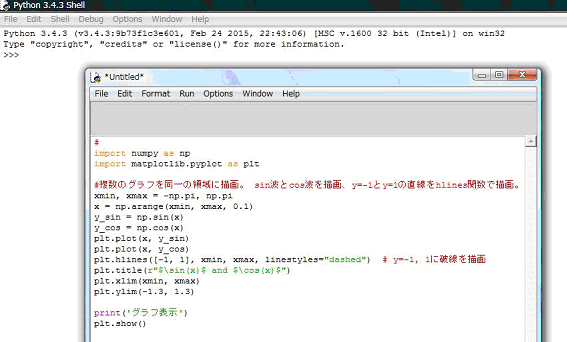
3. コード記入 一例
4. File>Save As で名前を付けて保存
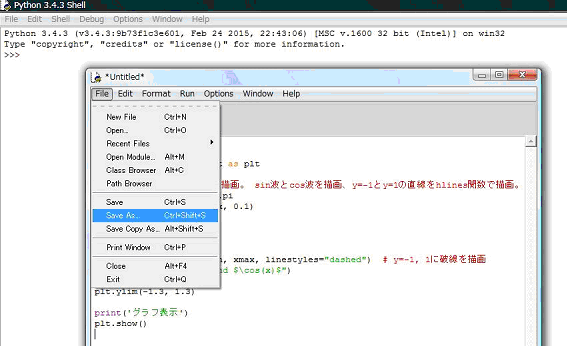
5. Run>Run Module

6. 出力表示
Print指定文とFigure
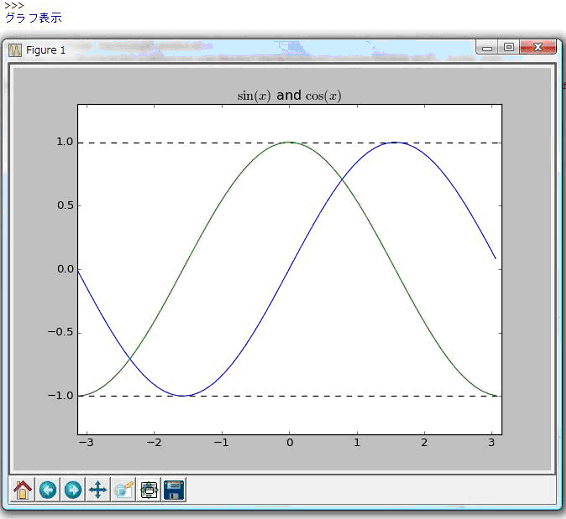
7. 終了
Figure1を閉じ、ファイルを閉じ、Python shellを閉じて終了
8. 再度
Python IDLEを起動して、Python shellオープン
以降、本で参照しているPythonコードファイルをオープンして、自分なりに理解を深める。
Windows VISTAで、Python、numpy、matplotlibをインストール
Windows VISTAで、Python、numpy、matplotlibをインストール。
「ゼロから作るDeep Learning」では不要であるが、ついでにpandasもインストール。
本では、Anacondaディストリビューションで、Pythonをインストールすべきとの記述があるが、手元PCではインストールできず。
最初からズッコケ。
使用PC
使用期限切れのWindows VISTA・・・これでできるかな?と思ったが、
悪戦苦闘、数日費やしてようやく出来た。
下記は最終的に実現できたインストール、設定の方法である。
なるべく、バージョンの新しいものを搭載したかったが、try and errorで限界を極めてみた。
Pythonは3.4.4が限界
matplotlibは最新版はもちろん駄目で、1.4.3がようやく入った。
pandasも最新版は駄目で、 0.14.1でインストールできた。
------------------------
1. Pythonダウンロード、インストール、設定
https://www.python.org/downloads/windows/
Python 3.4.4 - 2015-12-21
Download Windows x86 MSI installer
をダウンロード
python 3.4.4インストール
デフォルト作成フォルダー
c:\Python34
インストール項目
Add python.exe to Pathも入れる
Entire feature....
環境変数設定 システムプロパティダイアログの表示
スタート→コンピューター→コンピューターを右クリック→プロパティ→システムの詳細設定を順にたどるか、
コントロールパネル→システムとセキュリティ→システム→システムの詳細設定を順にたどって、システムのプロパティを表示。
環境変数設定 下記あり、設定不要。(インストール項目 Add python.exe to Pathも入れたため)
path
C:\Python34\;
C:\Python34\Scripts\;
再起動(不要)
コマンドプロンプトで確認
>python
Python3.4.4,,,,,
2. pip
c:\Python34\Scripts\
にインストールされている。処置不要。
3. numpy
コマンドプロンプトでインストール
>pip install numpy
Collecting numpy
,,,,
Successfully installed numpy-1.14.1
4. matplotlib
コマンドプロンプトでインストール
>pip install matplotlib
,,,failed,,,,
失敗、下記で対応。
---
https://sourceforge.net/projects/matplotlib/files/matplotlib/matplotlib-1.4.3/windows/
matplotlib-1.4.3.win32-py3.4.exe 2015-02-16 4.0 MB
をダウンロード
https://sourceforge.net/projects/matplotlib/files/matplotlib/matplotlib-1.4.3rc1/
matplotlib-1.4.3rc1.win32-py3.4.exe 2015-02-08 45.3 MB 0
をダウンロード
matplotlib-1.4.3.win32-py3.4.exe インストール
インストール後
http://hope-is-dream.hatenablog.com/entry/2014/11/18/083031参考
python
>>>import matplotlib
エラーが出て、
それぞれに関して以下のエラーを見て
ImportError: No module named six
>>>exit()
→pip install six
>>>import matplotlib
ImportError: matplotlib requires dateutil
>>>exit()
→pip install python-dateutil
>>>import matplotlib
ImportError: matplotlib requires pyparsing
>>>exit()
→pip install pyparsing
>>>import matplotlib
>>>
----下記エラー出なかった。不要。
ImportError: matplotlib requires `pytz'
>>>exit()
→pip install pytz
---
5. pandas
https://librabuch.jp/blog/2014/08/python_pydata_library_install/
Pythonデータ分析系ライブラリのインストール Windows / Mac
https://pypi.python.org/pypi/pandas/0.14.1/
pandas 0.14.1
Downloads ↓
Powerful data structures for data analysis, time series,and statistics
pandas-0.14.1.win32-py3.4.exe (md5)
チェック
>>>import pandas
>>>
6. Python の統合開発環境IDLEショートカット
c:\Python34\Lib\idlelib\idle.py
Python File(no console)版 をデスクトップのショートカットへ
以後、IDLEで、プログラム搭載、実行、確認を行っていく。
ディープラーニングにトライ!
爺さんだけど、
ディープラーニングにトライ!
書店で、「ゼロから作るDeep Learning」を見て一念発起、学習開始。
https://www.amazon.co.jp/s/?ie=UTF8&keywords=%E3%82%BC%E3%83%AD%E3%81%8B%E3%82%89%E4%BD%9C%E3%82%8Bdeep+learning&tag=googhydr-22&index=aps&jp-ad-ap=0&hvadid=217428417286&hvpos=1t1&hvnetw=g&hvrand=1434784236394841599&hvpone=&hvptwo=&hvqmt=b&hvdev=c&hvdvcmdl=&hvlocint=&hvlocphy=1009307&hvtargid=kwd-286686560844&ref=pd_sl_3bgwfi2t2v_b
ゼロから作るDeep Learning ―Pythonで学ぶディープラーニングの理論と実装2016/9/24
斎藤 康毅
Pythonなる言語を使用しているが、初体験。
先ず、開発環境を整える。